Saturday, December 9, 2017

25 Days Of Christmas Stuffed Envelope Pocket Journal~

Today, I have a large Stuffed Envelope Pocket Journal to share with you. I wanted to create a Vintage Christmas Theme, and I used lots of products from Reneabouquets to get that "days gone by" look that I just love~so nostalgic and so dear to my heart!


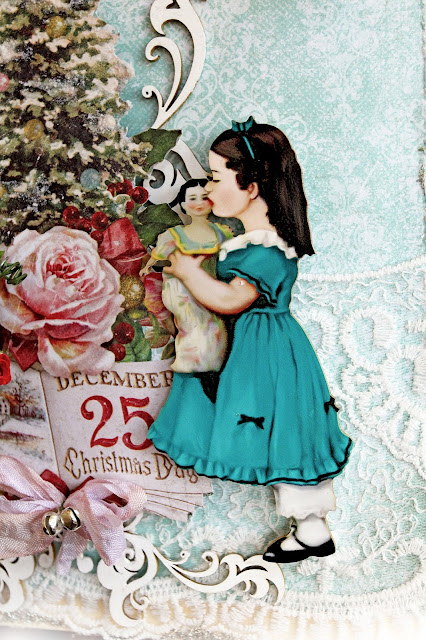
I started with a base that I created by cutting down manilla file folders and sewing them together to give me a piece that I can tuck lots of goodies into. I added a layer of distressed edge Blue Fern Studios Vintage Christmas Paper , and then edged the pocket out with Silver Christmas German Glitter Glass.
I ran a piece of Vintage Wedding Lace across the bottom. I added some Reneabouquets Beautiful Board Laser Cut Chipboard Medium Victorian Scroll Pattern pieces, 


and then fussy cut out a Christmas Tree from the papers, adding texture paste to the edges for a snowy effect and layered that on top of the BBoard pieces.  I then added some flowers from the following RB Flower Sets:

Winter White Mulberry Poinsettias, Curly Roses & Holly Leaves Flower Set

Soft Pink Roses Gardenias & Leaves Flower Set
Pink & Ivory Mini Roses Flower Set
to the corner of the tree, popped on a little Magical Miniatures Premium Paper Double Side Printed Watercolor Spun Sugar Butterfly, and took a small glass vile, filled it with Silver Christmas German Glitter Glass, added a "wonderful" sentiment to it along with some hand dyed seam binding and a tiny Pink & Ivory Mini Rose, and tucked that behind the flowers for a fun embellishment for the journaling tags inside the pocket.


I then added a Large My Doll And Me Printed Beautiful Board Laser Cut Chipboard Die Cut, and then created a little seam binding bow with silver tiny jingle bells and added that to the scroll boarder.

I added a sweet, little bottle brush wreath to the top corner of the pocket, adding some matching flowers and seam binding bow to decorate it up.


All the tags and booklets were made from the Blue Fern Studios Vintage Christmas Papers
and include:
2 Large Double Sided Tags with Seam Binding Bows topped with Anastasia Rhinestone Brooches
2-Medium, Double Sided Tags with Seam Bow Binding Bows topped with Pink & Ivory Mini Roses
2- Small Double Sided Pull Outs
2- Folded Pieces
A Little Jar of Silver German Glitter Glass


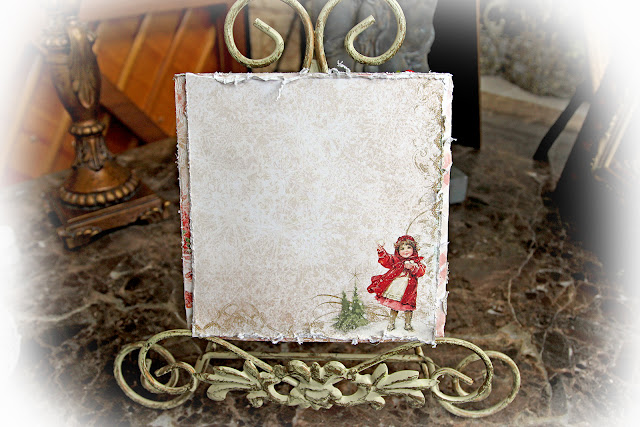
The backside of the pocket is finished out in matching papers and edged with the Silver German Glitter Glass for a finished, designer look.

I hope you have enjoyed the walk through of my Stuffed Envelope Pocket Journal, and I also hope that you are enjoying this Christmas Season!! Now it is time to grab a big (ok huge) cup of hot chocolate and lounge around the fire place and dream up some new Reneabouquets Creations!! Hugs ~Renea

Products Used From Reneabouquets.com and the Reneabouquets Etsy:

Winter White Mulberry Poinsettias, Curly Roses & Holly Leaves Flower Set


Wednesday, November 22, 2017

Create A Christmas Card While You Get Ready to Head Out The Door~

As we head into the busy Holiday Season, I have less and less time to create! Between family, designing, manufacturing and packaging new products for my Reneabouquets Shops, I just don't have a spare moment!!
So here is the scenario:
You are about to start getting ready to head to a friends or families party or dinner, and you realize you need a nice card and you would love for it to be one that you created, not one of those grab and go cards from the convenience store.
Solution:
Create one as you are getting ready, and here is how:
Grab a shower, then


Grab a really nice quality 12 x 12 sheet of scrapbooking paper. I used the a piece from the Blue Fern Studios Vintage Christmas 2 Paper Collection. Cut it in half , leaving you with a 6 x 12 Inch piece.
Score it in half, forming a 6 x 6 Card. Take the other half, cut it in half and heavily distress the edges, and add some Reneabouquets Diamond Chunky Glitter Glass for a nice icy look and set aside to dry.


When you use a nice quality, double side paper, you have a really nice finished out inside, like this one.


Use the other half  of the paper that you are making the cover with, distress the edges and add it to the back side of the card.


Cut a sentiment from your paper stash, take a paint brush and brush on some Ranger Texture Paste.
While all of this is drying, go dry your hair, style it and apply your makeup.


Come back add the glitter edged paper to the card, run some Reneabouquets Bridesmaid Lace across the bottom, add your glittered snowflake to the base, attach to the front of the card. Take some foam tape and add a Reneabouquets Printed Beautiful Board Small Victorian Winter Die Cut In Frosty Pink. Add a leftover piece of the lace to the top of the card.


Add Reneabouquets a Winter White Poinsettia, and some holly leaves, a
Reneabouquets Red Mini Rose to the bottom, and repeat some flowers at the top. Brush the Pink & White Roses with some of the Texture Paste Sprinkle with silver glitter.
Remember a little glitter in your hair , on your clothes and mixed in with your makeup looks amazing at this time of year-LOL!!
While that is drying, pull on your clothes, grab the card and out the door you go with a wonderful, heart felt, handcrafted card in your hand!!!
Reneabouquets Products were designed to make crafting, fun and original while giving you details , dimensions and textures that make creating a breeze!!
 I hope you enjoy your Holiday Season!! Thanks for stopping by!! Hugs ~Renea


 Items used on this project that you can find at Reneabouquets.com and in the Reneabouquets Etsy:

Wednesday, November 8, 2017

Rose Garden Fairy Tea Cup~

I love to create miniatures!! They remind me so much of my childhood and creating miniatures with my Pawpaw. To me there is nothing more magical than creating a "little world" of my own.


I started with a Reneabouquets 
that I put together, and then stuffed with some Teddy Bear Fluff, so that I could start my layering.
Beautiful Board Medium Brick Element, emptied out almost all of the bricks to leave a skeleton, and made the background wall for my fairies garden. I added sand texture and some 
Rose Gold Microbeads to the bricks that I left in place. I added some Pink Sorbet Mini Roses
to simulate roses growing up the wall. 
Next, I tucked in a Watercolor Rose Garden Fairy Double Side Printed Die Cut, and added some glitter paint accents to the front side.


I used flowers from the following flower sets to add to the garden theme:
Spring Green Roses & Leaves
I then dangled a little Fairy Trinket over the edge of the cup.


I used Bridesmaid Lace  on the Saucer, and then added some flowers from the following sets:


I added the sweet little moon Fairy Trinket to the bottom flowers, and popped a little piece of bling onto the top.


These little tea cups are so much fun to make!! I love that you end up with a sweet little miniature that you can view from all sides and use to decorate your home, child's room, party or wedding shower with!!

Thank you for stopping by and indulging my love for all things miniature!! I hope that you get to create something that reminds you of the ones you love when you get some crafting time. Hugs ~Renea

Products Used From Reneabouquets.com and the Reneabouquets Etsy:


Saturday, November 4, 2017

Bee Still My Beating Heart~


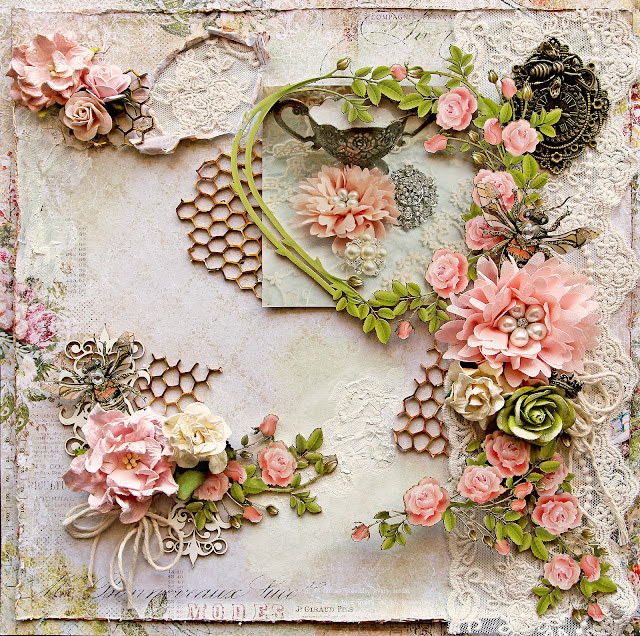
I love Bees, and I wanted to create a Fall Layout and pull them into the theme while keeping it kind of Shabby Chic at the same time. I used lots of new products that you can find at Reneabouquets.com and in the Reneabouquets Etsy to create this piece and to capture my love of Bees, and Shabby Romance!!


I layered in 2 different layers of papers, distressing the edges of the top paper and running a Tim Holtz Tea Dye Distress Ink Pad over the edges. Next, I ran a piece of Timeless Ivory Lace up the right side of my papers, and 


Under the top, right hand corner of the frame, I added a Baroque Metal Frame Trinket, and then topped the frame with a Bee Clock Trinket.


I then create a flower layer using a Large Oh So Shabby Blush Chiffon Rhinestone And Pearl Flower, some flowers from the following flower sets:
and the Queen Bee Glass Wings are some of my latest handcrafted creations. The bottom layer is created on my Reneabouquets Premium Paper, and the top layer is a transparent acetate layer that give these bees a unique and creative look. 
I then took some printed chipboard pieces that I had left from when the frame was in prototype stage and cut them apart and layered them into the flowers. I hate waste, and try to run my shop with as little waste as possible and using the prototypes that didn't quite work out is a great way to get a unique look instead of tossing them into the trash. 
The little crown is a  Fairy Princess Crown Trinkets In Tarnished Brass ,  and I just tucked it into my flowers and added a yarn bow for lots of texture.


Tim Holtz Wild Honey Distress Ink, and Tim Holtz Vintage Photo Distress Ink, cut them into pieces and tucked them into various spots on my layout.

I did a tear in the top left, hand corner of my layout and put some of the Timeless Lace underneath to peek through, added some more of the Bee Hive Elements Beautiful Board and some more flowers from the following Flower Sets:


At the bottom left hand corner of the layout, I took 2 Beautiful Board Large Victorian Scroll Accents, topped it with another Queen Bee, added another Bee Hive Elements Piece, more flowers, another leftover Printed Board Piece and another yarn bow to create another focal point in my layout.
I then took some Ranger Opaque Crackle Paint, and did some painting to get a gorgeous crackle look on various places in the layout, inking over the top of the crackle to bring out the cracks.


I just love texture and dimension, and the products that I carry in the Reneabouquets Shops allows you to bring those elements into your art,  giving you unique, "beautiful with an edge" products that allow you to create in your own style.

I hope you have enjoyed the  Romance meets Nature look of my layout, and I so appreciate you taking the time to stop by and check it out!! Fall is almost over and before you know it Winter will be here, so take the time to go out and enjoy the gorgeous colors before they are all gone!! Hugs ~Renea

Items used from Reneabouquets.com and the Reneabouquets Etsy:

Thursday, October 26, 2017

Graphic 45 Enchanted Fairy Altered 3D Purse~

I always loved the Graphic 45 Springtime Paper Line, but up until now had not had a chance to use it, and so I decided to take the more Autumn tones from the line and create an Enchanted Fairy Altered 3D Purse with pockets for tucking treasures into!!
This project was so much fun to create, and I hope you enjoy my step by step walk through of it!!
You can find all the items that I used in the Reneabouquets.com and Reneabouquets Etsy, and I have a product list with links at the bottom of the post.

You can also join in on the Reneabouquets November Oh So FABulous Purse Swap hosted by Design Team Artist~Donna Anderson here:
Reneabouquets Facebook Page


I started with a Beautiful Board 3D Purse With Small Shelf Laser Cut Chipboard Kit, assembled it and then got to decorating!!
Before I assembled the kit, I used it to make a template on all of the Graphic 45 Springtime Deluxe Papers that I was planning on using, allowing me to easily use the pieces for templates and get a really, nice finished look.


I first edged the paper out with Rose Gold Microbeads &
Sand Chunky Glitter Glass.  I then added some #003 Crochet Lace across the bottom and topped it with one of the sticker pieces from the G45 collection. I then took a Beautiful Board Small Cherry Blossom Branch, and layered in lots of different colors with distress markers to get a realistic look, and topped it with a little owl from the Memory Keeper Trinkets  . I love the exclusive coating on the chipboard, it really grabs the colors and allows you to create small works of art!!
I fussy cut the little fairy and frog images from the papers, and then glitter painted accents on them and added some Soft Peach Mini Roses, and various tiny flowers from my stash.


Beautiful Board Tiny Victorian Scroll Pattern  pieces to the sides and handles of the Purse to give it a unique, ornate look. I just colored those with distress markers and added little pearls to the Large Accent piece.


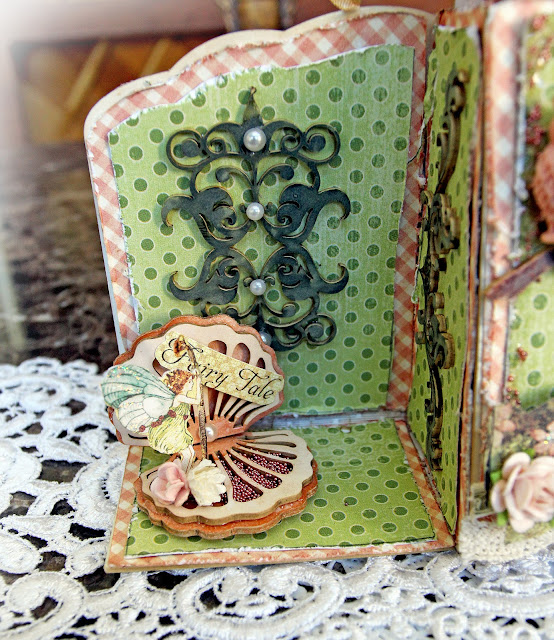
I then took a Beautiful Board Small 4D Shell Compact that has a hinge that I designed so that the piece can actually open and close, and separate decorative layers that allow for easy layering of colors and decorations, and turned it into a little diorama to add to the shelf of the Purse. 


I embossed the outside of the compact in a darker color, then embossed the decorative pieces with a lighter color, accenting the opening with the pearl with the darker color. I filled the insets of the shell with Rose Gold Microbeads and then fussy cut out a little fairy from the papers, added her and some tiny flowers and then cut out the "Fairy Tale" piece from the G45 Collection sticker and popped that on. 


The back of the purse is finished out as well for a designer look with papers from the collection, stickers from the G45 collection along the bottom and the B Board frame and accents from the Beautiful Board Tiny Victorian Scroll Pattern  that I colored with distress markers, accented with pearls and more of the mini roses and tiny flowers.


In the pocket section of the purse, I decorated the Beautiful Board 4 Piece Shell Tag Set to create places to journal or pop on small photos, You can also tuck in small momentos into the pockets of the purse.


Tucked into the Purse Pockets is also a Beautiful Board Star Fairy Pocket Wand. I painted the whole wand with Prima White Crackle Texture Paste and then went over it with Tim Holtz Tattered Rose Distress Ink to bring out the crackle finish. I colored my fairy with distress markers and then added glitter paint to her wings. I added a hand dyed seam binding bow ( I just took some seam binding and sprayed it with Tim Holtz Tattered Rose & Tea Dye Distress Spray Stains, and added a little glass orb from the RB Fairy Trinkets  Set, and another soft peach mini rose.


I  covered the large tag with papers from the G45 Collection, then did some color and heat embossing work on the shell overlay that goes with the large tag and added it on. 


Back side of the large tag.


I topped the 2 Medium tags from the set with papers added some of the #003 Crochet Lace to the bottoms and topped them with Oh So Butterlicious Glitter Glass Butterflies.

I just love how this piece turned out!! So magical and so perfect for gifting!! I love that it can be a wonderful decorative piece and a secret spot for tucking in treasures!! I hope you have enjoyed your stop by my blog!! Have a great weekend!! Hugs ~Renea
Items that you can find at Reneabouquets.com and in the Reneabouquets Etsy Shop that were used on this project: