Wednesday, November 30, 2011

Jack -Twisted Sketch #130 Twist Flower

  Time for another sketch with a twist from Twisted Sketches! The following is my layout for Sketch #130 with the Twist Flower. I created this layout with my uber gorgeous Scraps Of Darkness November Kit-Purple Haze. It features a photo of our little Jack Russel Terrier appropriately named Jack-lol! His full name is Jumpin' Jack Flash and he is just as wild as that name!  Jack loves the fall season! He lives for his daily walk and hike around the lake and through the woods at our home. He loves to run through the leaves as fast as he can, swooshing through and delighting in the sound that the leaves make under him. He also loves to chase anything that moves, and fall is when the squirrels and chipmunks are out in full force so he is in heaven racing around after them through the leaves. I just love watching him! With his love for fall, I just had to scrap him with a fall color scheme, plus I love the way the leaves look in the photos that I shot of him.

I started with a piece of card stock from this month's add on and then took a piece of the Bo Bunny Kit pp and deeply distressed, and stained the edges, rolling some of the edges to get dimension. I then set the placement of my photos, and took a Crafter's Workshop Chicken Wire Template, and using gel medium, Tattered Angel Glam, and a heat gun created the textured, stenciled areas on the pp.


I set eyelets in the corners of the photos and then adhered them with foam tape. I braided some hemp rope together and ran it along the corners of the photos. I then used some Heartfelt Creations Stamps to create the Sunflowers, inking and scrunching them for dimension and filling in the centers with hand tinted glitter glass. I took some chipboard pieces from a past kit and sprayed them with TA mist and then layered in some of the Prima leaves from last month's kit.


I used some stash Chipboard letters that I sprayed with different colors of TA mists and then smooched the edges with the Pumpkin Smooch from a previous kit color add on to create my large title of Jack's name.

I then took one of the Bo Bunny Noteworthy pieces from this month kit and added a stash Tim Holtz spinner and then took some Vintaj blanks, and embossed them with the embossing folders from the Metal Add On. I then sanded the images with the Vintaj block from the add on and painted the images with alcohol inks and took 2 Vintaj leaves from my stash, cut them down and adhered them to the pieces. I attached some of the jump rings from the Add On and set the brad through them and then into the spinner and the die cut. For the final touch, I took burlap pieces and placed them randomly around the outer edge of the distressed layer where I had curled the edges, and then popped some Teresa Collins brads from the September Kit into the corners.

Jack is such a wonderful companion. He has so much energy, is so smart and just the perfect buddy for my active lifestyle. He adds so much enjoyment to my life, as well as a little craziness as well! He definitely keeps life interesting! ~Renea

Monday, November 28, 2011

Haunted Twisted Sketch #128 Twist White **Scraps Of Darkness**

Twisted Sketches  has another Wednesday reveal, and I got to work with the beautiful sketch # 128 with the twist of "white." This was my last squeeze from my Scraps of Darkness October kit, and also my just for fun entry into Lisa's (aka Raining) always unique Skeletons In The Closet Challenge.  The challenge was to scrap who you are when no one is looking, you had to use a recent photo and you got a bonus point for photo editing. My entry is titled Haunted, because when no one is looking, I will be forever haunted by my dysfunctional upbringing. I really don't want to go into a lot of personal detail, but to say my wounds go so deep that even time has left great scars is an understatement. I snapped a photo of myself, and then took photos of my biological family and me,  Photoshopped them over my recent photo to give the illusion of ghosts and kind of a holographic effect as well.

Here is my take on the sketch, with lots of white layers:

I started with some of the Pink Paislee pp from the kit and then cut a circle from some of the other kit pp, inked and distressed the edges with some of the Shimmeringz mist from the CAO applied to a sponge. I then took white cardstock, repeated the process and made the first layer of the photo mat, then another layer of Pink Paislee pp and then the photo itself, distressed and inked.

Here is a close up of the photo:

 I created a side strip by punching some white card stock and then the strip at the bottom was created using white card stock that I distressed and rubbed with the mist, and then applied some of the rub ons from the Romance Add On on to. I then took the Prima Bat vine, that I had used all the bats off of , and layered some hand made white flowers that I embossed, inked the edges on using the Ingvild Bolme ink in the kit, and then popped in some brads from my stash.


I then took some Tim Holtz charms, cut out some of the Pink Paislee pp to fit and then applied crackle medium on top to get a crackled glass effect. I then hung them from my branch with strips of rhinestones.


I took one of the acetate pieces from the kit and used layers of foam tape to adhere it and give it dimension. Next, I took the H from the banner kit in the Romance Add On, distressed and inked the edges and then cut out the rest of the title from a Halloween Flyer I had gotten in the mail. I can't resist a chance to recycle-lol! I then took a little Tim Holtz bottle and filled it full of rhinestones to simulate my tears in a bottle. Anyone who knows me, knows that I never cry, I keep it bottled up inside.


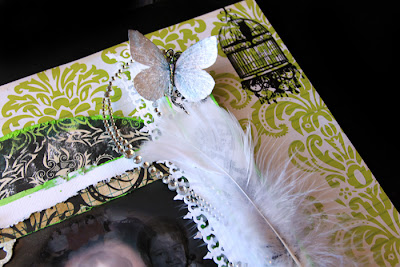
To finish the layout up I popped a feather behind the large flower to create that soft, ghostly feel, added some Prima Crystal Swirls, and popped on some of my Ice Butterflies from my Etsy shop.

Now, you know who I am when no one is looking, I am Haunted. Hope you can come play along with the sketch!  ~Renea

Monday, November 21, 2011

Be Happy Scraps Of Darkness November Round Robin

Time to kick off another round of Round Robin over at Scraps Of Darkness! I have the pleasure of starting out Team 4 along with:
Beth-Rabbit
AshleyVanetten
Monica (mmlsweet)

Can't wait to see what my team mates do with the design!! It is always so much fun watching the layouts evolve, and I just love watching my Dark Sister's personalities shine through in their work.

This is my layout, featuring, Me!! This photo was taken a couple of years ago by my son, I was 42 at the time and I am one of those people that when I smile my eyes disappear, but you can actually see some slits in this photo-lol! I just can't help it!! I am a very happy person and when I smile I can't help but smile with my whole being. Kind of like one of those dogs that can't just wag it's tail, it wags it's whole body-that is me!! I truly believe that being happy is a state of mind, therefore my title "Be Happy".


 I scrapped this layout using my divine Scraps of Darkness November Kit Purple Haze plus a few stash pieces. I started off with a piece of the beautiful Bo Bunny Garden Girl pp and then used a piece of BB pp from my stash to form the distressed border layer. I then took a piece of card stock from this month's add on, punched it and hand stitched it.


I then took layers of the Bo Bunny Noteworthy dies from the kit, along with a piece I cut with my Cricut and layered them in decoratively around the photo, adding some of the ZVA gems from the Romance Add On to some of them.  I took some SM Chipboard Hinges and stained them white then took some of the BB Rub Ons from the Romance A.O. and decorated them adding in some more of that ZVA Bling.
I created the flower layer at the photo by cutting out a scroll design with my Cricut. Cutting out some foliage with my Sizzix and then layered on one of the Prima Regia Flowers from the Flora & Fauna A.O. and some stash Prima Glitter Roses. I then tucked in one of the Prima Resin Treasure pieces from the Romance A.O. for detail.

In the bottom left hand corner I cut some strips of pp, scalloped the edges, and water distressed it and layered it in with one of the SM hinges, foliage, a Prima Rose and another resin treasure piece.

In the top left corner, I layered in some Bo Bunny Sophia pieces from my stash, some more foliage, another Prima rose and another resin treasure piece.

To finish the layout, I took a Dusty Attic Flutterby and painted it up with stickles, smooch and some liquid pearls from the kit. I then took a stash metal butterfly blank, and using my Vintaj embossing folder from the Metal add on, created the embossed design, then sanded it with the Vintaj block included in the A.O. , glued it to the DA butterfly and popped on a piece of the ZVA bling.

Thanks for the visit and remember life is too short to sweat the small stuff-Be Happy!! ~Renea

Wednesday, November 16, 2011

Berry Bleu Pages And Tags Reveal-Fall Frame

It's reveal day over at Berry Bleu Pages and Tags, and this is my project that I came up with using one of the Thanksgiving tags that Marivic has up for grabs in her Etsy Shop. I just love using the beautiful Berry Bleu Tags to create with. They make creating both stunning layouts and projects a breeze. For this project, I wanted to create a  gift for my Mother In Law who hosts Thanksgiving Dinner at her home for all of us.


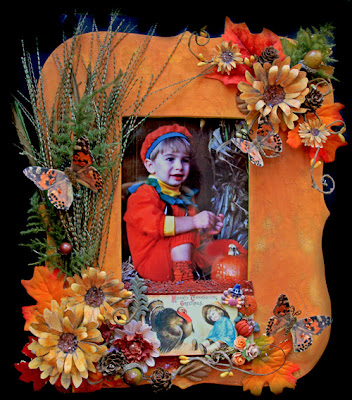
I purchased a frame from the clearance rack at a local store. It was a black and cream color, so I covered it with Gesso to cover up the color and lay down the foundation for the fall colors I wanted. I then painted the entire frame with Tim Holtz Mustard Seed Crackle Paint. I dried it with a heat gun to get the deep distressed look that I love. I then took Terra Cotta Alcohol Ink and Alcohol Ink Blending Solutin and washed it over the frame to get the 2 toned look.
I attatched my Berry Bleu Thanksgiving Tag and then started layering in my florals and leaves.

The sunflowers are ones that I fussy cut from some K & Company pps and then inked and stained to get the rich colors. I shaped the petals and rolled some of the ends to create dimension, and then I hand tinted some Diamond Dust with Coffee Bean Mist and sprinkled them into the centers. I took some left over fall vines that I had from an earlier project and pulled pieces of the vines, acorns and pinecones from it and attatched those. I took some fall leaves and popped them around the sunflowers for color.
I used the same flower and foliage technique up in the right hand corner.

I tucked some long reeds and foliage pieces into the flowers and let it flow up the left side of my frame, popped on  a set of my Autumn Splendor Butterflies from my Etsy Shop and then put a photo of my DS, Draven from when he was a little pumpkin for Halloween, into the photo holder.

I hope this gift lets my Mother In Law know how much I appreciate her, and I hope each one of you have a wonderful Thanksgiving surrounded by the people you love! With great gratitude for your friendship ~Renea

 We can only be said to be alive in those moments when our hearts are conscious of our treasures.  ~Thornton Wilder


Tuesday, November 15, 2011

Scraps Of Darkness Reveals It's November Kit-Purple Haze

It's time for my favorite time of the month, reveal day over at Scraps Of Darkness. Once again, Melinda has put together another ultra luscious, uber versatile kit.


The Main Kit includes:
Patterned Paper by: Bo Bunny, Basic Grey, and  Quick Quotes Julie Je t'aime
Along with:
Kaisercraft Alpha Chipboard #3
                  Bo Bunny Garden Girl:  Noteworthy die cuts
                  ZVA CR-03CA-116
                  Paper Moon Supply - Magic Tag
                  Quick Quotes - How Wonderful Vellum Journaling
                  Basic Grey - Indie Bloom Accordian Stickers
                  Ranger Liquid Pearls - Cantaloupe
                  Hand dyed Silk Bias Cut Ribbon
                  Peace sign brads
You can also pick up some super gorgeous add ons that coordinate wonderfully with the main kit including: The Romance Add On, The Coordinating Paper Add On, The Flora & Fauna Add On, The Color Add On, and for this month an out of this world Vintaj Metal Add On. But, you better hurry, because they sell out quick!!

The following is the beyond beautiful sketch created by Charlotte (aka Sue Pup) for the Scraps Of Darkness kit:


And here is my take on the sketch. It is titled Scatter Sunshine, and  features my Sister In Law's Daughters Kimmie and Katie. This layout shows the feminine side of the kit and features some of those luscious purple hues of the title:


I started with some of the Quick Quotes pp, took a second layer of pp and punched it, then took a third layer, scalloped the edges, distressed and stained them, and did some machine sewing. I took card stock from a previous add on and cut it out, distressed and inked the edges, took some of the kit pp cut it to the same shape and then mounted the beautiful photo of the girls onto it.


Next, I took some Innocence Flowers in Lavender from my Etsy Shop  and attached them to the bottom and the top of the photo. I tucked in my Craftysprinkles pin from the Romance Add On, took and cut out the sentiment from the Quick Quote from the Romance A.O. to match the inside of the Prima Adore Heart which can also be found in the Romance A.O. and adhered it with foam tape for dimension.


To create the strip layers I took some of the same cream cardstock as I used behind the photo, cut it into strips and distressed and inked the edges. Took some of the same kit pp, distressed and inked the edges and layered it on. Cut some hearts out with my Cricut and popped on some of the ZVA bling from the Romance A.O. then took a little heart border and added it to the bottom.
I created a peek a boo in the left hand corner of my 3rd layer and Stickled up one of the sweet little owls from the kit and added on one of the adorable little nests from the Romance A.O.

I took a Dusty Attic Birds On A Branch, Painted the branches with Vintage Photo Crackle Paint, the leaves with Peeled Paint Crackle paint, the little birds with Berry Smooch and Milled Lavender Stickles. Cut out some centers to match my flowers, and popped on some of the ZVA bling from the kit, and one of the little nests from the Romance Add On. I then stickled up some butterflies, that you can find here on my blog http://myglittercoatedlife.blogspot.com/p/blog-page_02.html and added them onto the layout.

This next layout shows how you can take the kit and create a seasonal layout. I chose the rich colors of fall to create this layout featuring my God Daughter and her family.


I started out with a stash piece of pp, then distressed and inked the edges of some of the card stock from this month's add on, the next layer is a piece of the Bo Bunny Garden Girl pp from the kit that I cut out using a Crafter's Workshop Template, distressed and inked the edges on and then did some machine sewing for interest.
I took another piece of the Bo Bunny pp created the photo mat, and distressed and inked the edges. I took the photo of my God Daughter Michelle, and her family and rubbed on some of the Bo Bunny Garden Girl Rub ons from the Romance Add On.


I took a piece of card stock from the A.O. distressed and stained the edges, then took a Prima Stencil and the mist from the CAO and created the design on the card stock. A piece of the Bo Bunny pp that I scalloped the edges on and inked makes up the second layer, and then I took a Vintaj Metal Blank from the Metal Add On and embossed it using the including embossing pad and my Sizzix, then buffed it out with the included Vintaj pad and accented the tree design with alcohol inks. I then took a Vintaj piece from my stash, broke it in two and adhered it to my metal piece to create the design.


 I took a piece of pp from the Coordinating Paper A.O. and created the bottom border then attatched some stash Alphas to spell out the Love part of my title, took some Glitz Tiny Alphas from my stash and completed the sentiment and title to my layout "Fall In Love".

I took a piece of my Fall In Love Flowers Set from my Etsy Shop and attached it to the right hand corner of the shaped layer.

Took the second piece of my Fall In Love Flowers Set and attached it at the bottom of my photo layer. Punched and inked some Maple leaves. To finish up my fall look, I took some Tiger Butterlies from my Etsy Shop and attached them throughout the layout.

This next layout shows the Fun Side of the kit and is also my layout example for the Stalker Challenge that I host over at Scraps Of Darkness. This month there was a bit of talk going on about bringing back some of the hippie slang from the late 60's and 70's and it put the idea of the challenge into my head.  Here are the rules:
1. Use at least 80 % Scraps Of Darkness product
2. Stalk the internet for a photo of someone famous rocking their hippie chic.
3. Bring back one of those slang hippie words through the imagery and title
4. Have Fun!!!

Here is my layout featuring a photo of Cher from the early 70's and I am bringing back the word "Groovy"! So, if I sling out a groovy when I leave you a comment, you will know that just like Cher, your work is fabulous-lol!


The background layers are card stock from the A.O. and Bo Bunny Garden Girl pps from the kit.


I then took some of the BB Noteworthy pieces from the kit and layered them in behind the photo, took a piece of the BB pp, punched it and made the photo mat, then mounted the photo of Cher on.

I took the white fringe from the Romance Add On and layered it across the bottom, adding on some of the peace sign brads from the kit. I took a layer of  pp and punched, faux sewed, and used some of the BB rub ons from the Romance A.O. on and layered it beside the photo, fussy cut two other designs from the pps, adding rhinestones to one. and attached them with foam tape for dimension. I used the ZVA flourishs from the kit and then layered more of the accordion stickers onto it. I took a large daisy from my stash cut it in 1/2 and layered on one of the accordion stickers from the kit. Tucked in the Paper Moon tag from the kit and a metal and crystal butterfly from my stash.

I took a large daisy from my stash cut it in 1/2 and layered on one of the accordion stickers from the kit.

 I took one of the Bo Bunny Noteworthy pieces, stickled and blinged it up then attached it with foam tape. I took one of the Accordion sticker, popped a crystal center onto it and then layered in some of the Hand dyed Silk Bias Cut Ribbon and some white ribbon to form my groovy streamer. I then popped on my title "Groovy" down the side of the photo using some stash glitter alphas.

And last, but not least is a layout I created to show the sweet side of the kit. My DH listens to Country music and I was riding along with him and heard this heartwarming song called "She Thinks We're Just Fishing". It is about how what a little girl thinks that what her and her daddy are doing together is just fishing, but in reality it is an everyday event that holds so much more than she realizes in it. How little acts bond us together and create memories that become an amazing part of who we are. When I saw this photo of little Emmie fishing with her daddy Andy, it reminded me so much of that song, henceforth the title of this layout "She Thinks They're Just Fishing".

 I started with some of the kit pp then took a piece of the card stock add on, used a template for the edges, then distressed them and did some machine sewing. I then cut out a square of Bo Bunny pp layered it in, cut the center out of a stash doilie, layered it in then took some of the kit pp, punched the edges, did some machine sewing and adhered it with foam tape for dimension.


I took the photo of Emmie and her Dad and photo shopped the first part of the title onto it then did some framing and added it on with some foam tape. I cut out some scrabble letters, that you can find here on my blog http://myglittercoatedlife.blogspot.com/p/blog-page_02.html, coated them with glossy accents, let them dry then adhered them with foam tape.


I cut a small princess frame with my Cricut and inked it up then added some of the ZVA bling from the Romance A.O. and popped in a photo of Emmie sitting back with her fishing rod.


In the top left hand corner, I added one of  my Visions of Sugarplums Butterflies from my Etsy Shop and gave it a butterfly trail with some of the left over ZVA bling from the kit.


In the right hand corner, I folded down the edge, pleated a piece of doilie and popped it in to the fold down, took one of the Bo Bunny Noteworthy dies and popped it on and then added in another butterfly.

I had this cutie pie Prima Owl that I had purchased on an outing with my sister when I first started scrapbooking and this kit and layout offered up the perfect opportunity to use it.  So I foam taped him to the bottom corner of my photo and started building the flower clusters around him.

I took the Prima vine from the Flora & Fauna A.O. and ran it across the bottom and popped in some of the Petaloo flowers from the same add on, as well as adding some punched and inked pieces behind some of them . I pleated another piece of doilie and tucked it in, adding a little bow made out of the  silk bias ribbon that was leftover from my first layout, and then added in one of those sweet Prima nests and popped on a small butterfly to finish everything out.

Thank you so much for dropping by for my reveal day layouts! I am always so grateful for your support and friendship. Please feel free to pick up some butterflies or alphas from my Butterflies, Dragonflies and Alphas page. I love to share with all my scrappy sisters! I hope you enjoyed your visit! Hugs, ~Renea