Friday, May 29, 2015

Heart~Scraps Of Darkness/Scraps Of Elegance ATC Swap


Just a quick Friday post to show you an ATC that I created for my Scraps Of Darkness/Scraps Of Elegance ATC Swap partner~Tosha Crow. I used the Scraps Of Elegance Lynne's Garden Terrace Kit to put this little gem together and I chose the Lavenders and Purples, because I knew that was Tosha's  FAV color!

If you would like to join us for some of the super fun challenges and swaps, please join us here:

I hope you have a wonderful weekend!! Hugs ~Renea


Items used from  Reneabouquets.com  and the Reneabouquets Etsy :

Tuesday, May 19, 2015

Reneabouquets Chubby Little Cherub 3D Tea Cup DIY Kits~Now Available!

Anyone who knows my work, knows that I love to do miniatures, and now you too can create the sweet little teacup that you see in the photo for yourself!! This Reneabouquets DIY Kit includes everything you need to put together your own version of the one that I created as an example, and you can find them here:
or here:


The Tea Cup Die Cut set, is one that I took a template that I use to put together my little 3D Tea Cups that I do, did a digital redraw and improved upon the design, then turned it into a die cut so that I can offer my customers the die cut pieces for them to easily put together their own little works of art!! I even have a step out video that I created, walking you through the steps to put the pieces together here:

https://youtu.be/80oQQzBDfu4


Each listing includes:

1-3 D Die Cut Set in the papers shown (this paper was created by me just for this cup). This set is created with quality, thick Reneabouquets Paper for a piece that comes together beautifully. The papers are double sided with the same pattern so that you can create your cup either right facing or left facing.

1-Ball Of Poly Fluff wrapped in tulle for you to stuff your cup with

1-Large White with Rhinestone and Pearl Center, Chiffon Fabric Flower (this will form the base for all your treasures that you fill the cup with).

1-Chubby Little Cherub Die Cut~This little cherub was created by me from an old Vintage Photo that I restored, recolored, drew cherub wings onto then turned into a precision cut die cut that really makes her stand out. Her base is scored so that you can bend it and attach her to the fabric flower.

1-6 piece Set of Crystals to decorate the wings with

3-Small White Feathers

1-Prima Birds Nest in style Sparrow

3-Hand Tinted Mulberry Paper Flowers

2-Green Mulberry Paper Leaves

1-Tiny Silver Metal Tea Pot Charm with Tea Time on the front

1-Silver "Love" Stick

1- Reneabouquets Hand Crafted Tiny Treasure Cinderella's Glass Slipper Butterfly with Silver Antenna

1-Small piece of Cheesecloth and small piece of tulle for bottom of cup

1-Lace Piece for Bottom of cup

1-Silver Spoon with Sugar ( Reneabouquets Chunky Glitter Glass)


Because I care about quality, Card Stock & Papers are Acid-Free & Lignin- Free.

My papers and cherub were printed on a Professional Printer using Epson Ultrachrome K3 inks which are archival safe, permanent inks. This producies archival prints with amazing color fidelity, gloss level, and scratch resistance as well as a finish that is water and medium proof.


These 3D Tea Cups can be used for so many things!! Your imagination is the limit. I use them for my miniatures, but they can be used for party & wedding favor packaging, small gifts, treat bags, shower & tea decorations and so much more.

Thank you so much to all of you who support my work and allow me to make a living doing what I love!!

Hugs ~Renea

Monday, May 18, 2015

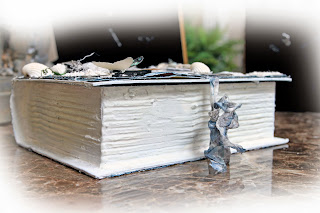
Hope Altered Book Box~


As we get closer and closer to Summer time, my mind starts to wonder to the beach, and when I saw this old Vintage Photograph , I just knew that I had to use the Scraps Of Darkness Kit~Laura's Wish to create a Memory Box that reflected a time worn seaside look.


I started with a paper mache book box that I coated with Dina Wakely Gesso, and then added layers of distressed and Tim Holtz Weather Wood Inked  kit papers. 


Next, I added in some of the Ephemera pieces from the kit,  then  came my photo.  I rolled some of the kit papers and tied them together with burlap string and added them in with the ephemera pieces.


 and  I then added some clocks that I fussy cut out from the kit papers, adding a Prima Sea Resin Starfish piece and some Prima Metal Clock Hands to the one at the bottom photo corner. 

The bricks were cut from the Prima packaging housing some of the kit embellishments that I painted with Prima White Sand Texture Paste. The flowers were from this month's floral add on, the seashells were some real ones from my stash, and the Tiny Treasures Patina Butterflies  are from my Reneabouquets.com and Reneabouquets Etsy Shop.


For the "binding " Side I layered on Tissue Tape and some Delicate Beauty Lace. Inking over the tissue tape to get depth of color. 


I created "pages" using a Ranger Texture Paste, technique and inking. The book ties closed with hand dyed seam binding ribbon.


On the inside I inked the gesso painting, added on strips of tissue tape and then layered some of the kit Ephemera into the bottom and Mod Podged over it, then gesso and Crackle Painted over them to give them a faded, time worn look. 


For the back I heavily distressed and inked kit paper with the "Learn from yesterday, Live for today, Hope for tomorrow " quote on it that I used on the front of the box. 

Thank you so much for dropping by!! I hope you have enjoyed my off the page project, and that you find the time to make and keep some Summer memories of your own!! Hugs ~Renea


Items from the Reneabouquets.com and Reneabouquets Etsy Shop that were used on this project:

Prima Sea Resin Starfish
Tim Holtz Crackle Paint


Monday, May 4, 2015

Because~Scraps Of Darkness April Kit Laura's Wish


Today, I have a layout to share with you that I created with the Scraps Of Darkness April Kit~Laura's Wish. I used a a photo that I took on my Father In Laws farm. It is of one of his old, rusty, retired tractors. The Harrison men love a good tractor, and a good days hard work! So this is my salute to them:


I used some of that wonderfully, rustic wood grain paper from the kit for the base layer.


I then took some corrugated board and tore it so get some of the backing as edge then sprayed it with Tim Holtz Distress Spray Stain In Rusy Hinge, hitting it randomly with some of the Lindy's Magical Powder then over spraying it with Tim Holtz Distress Spray Stain In Tarnished Brass


I used another piece of kit paper that I tore, inked and then hit randomly with  some more of the Lindy's Magical Powder and then oversprayed it with the Tim Holtz Distress Spray Stain In Tarnished Brass, I then added another piece of the corrugated board, and popped my photo on wind topped it with some stash metal buckles and TH gears from a past kit.


Here you can see where I fussy cut some of the large clocks out from the papers, added metal gears and tucked them into my tears.


I used the twine from the kit to wrap my edges and pin them down with a metal brad.

The quote was cut from from the pieces in the kit and distressed and stained then added on with foam tape for dimension.


The flowers were from the April Floral Add On, and the gears were stash pieces.

I hope you have enjoyed my rustic salute to those hard working men in my life!! I hope you have a great week!! Hugs ~Renea


Saturday, May 2, 2015

A Dancer's Heart Tag Set~

Today, I have a couple of Shabby Chic, Dance themed tags that I created using the April Scraps Of Elegance Kit~Lynne's Garden Terrace. All those pretty florals and colors are perfect for putting together some very Yummy projects!!


I created a matching set using some images that I had used before, scaling them down, distressing and inking the edges with Tim Holtz Distress Ink In Tattered Rose, and sewing them.


I tore out pieces of tissue paper, crinkled it up and inked it and layered that along with some of the tickets that were in this month's Embellishment add on, and then topped those pieces with my sewn image.


At the bottom I tore the paper into a V, then curled them back and layered ruffeled ribbon to "Peek" out, and topped it with a Prima Ingvild Bolme Resin Heart piece. I added stash mulberry paper flowers, and some of the flowers from this month's floral add on.


At the top of the photos, I added another Prima Ingvild Bolme Resin Heart piece and then pulled some Vintage lace through a hole and topped it with a Timeless Rhinestone Button.


Here you can see all the details on the 2nd tag.

And now I am off to garden!! We finally have some sunshine, so it should be a nice day to go play in the yard. I hope you have a wonderful weekend!! Hugs ~Renea


Items from the Reneabouquets.com and the Reneabouquets Etsy Shop: