Friday, June 21, 2019

Follow Your Heart Layout~


Hello, and welcome to My Glitter Coated Life!! Today, I have a layout that was created with products from Reneabouquets that captures my love of dance.

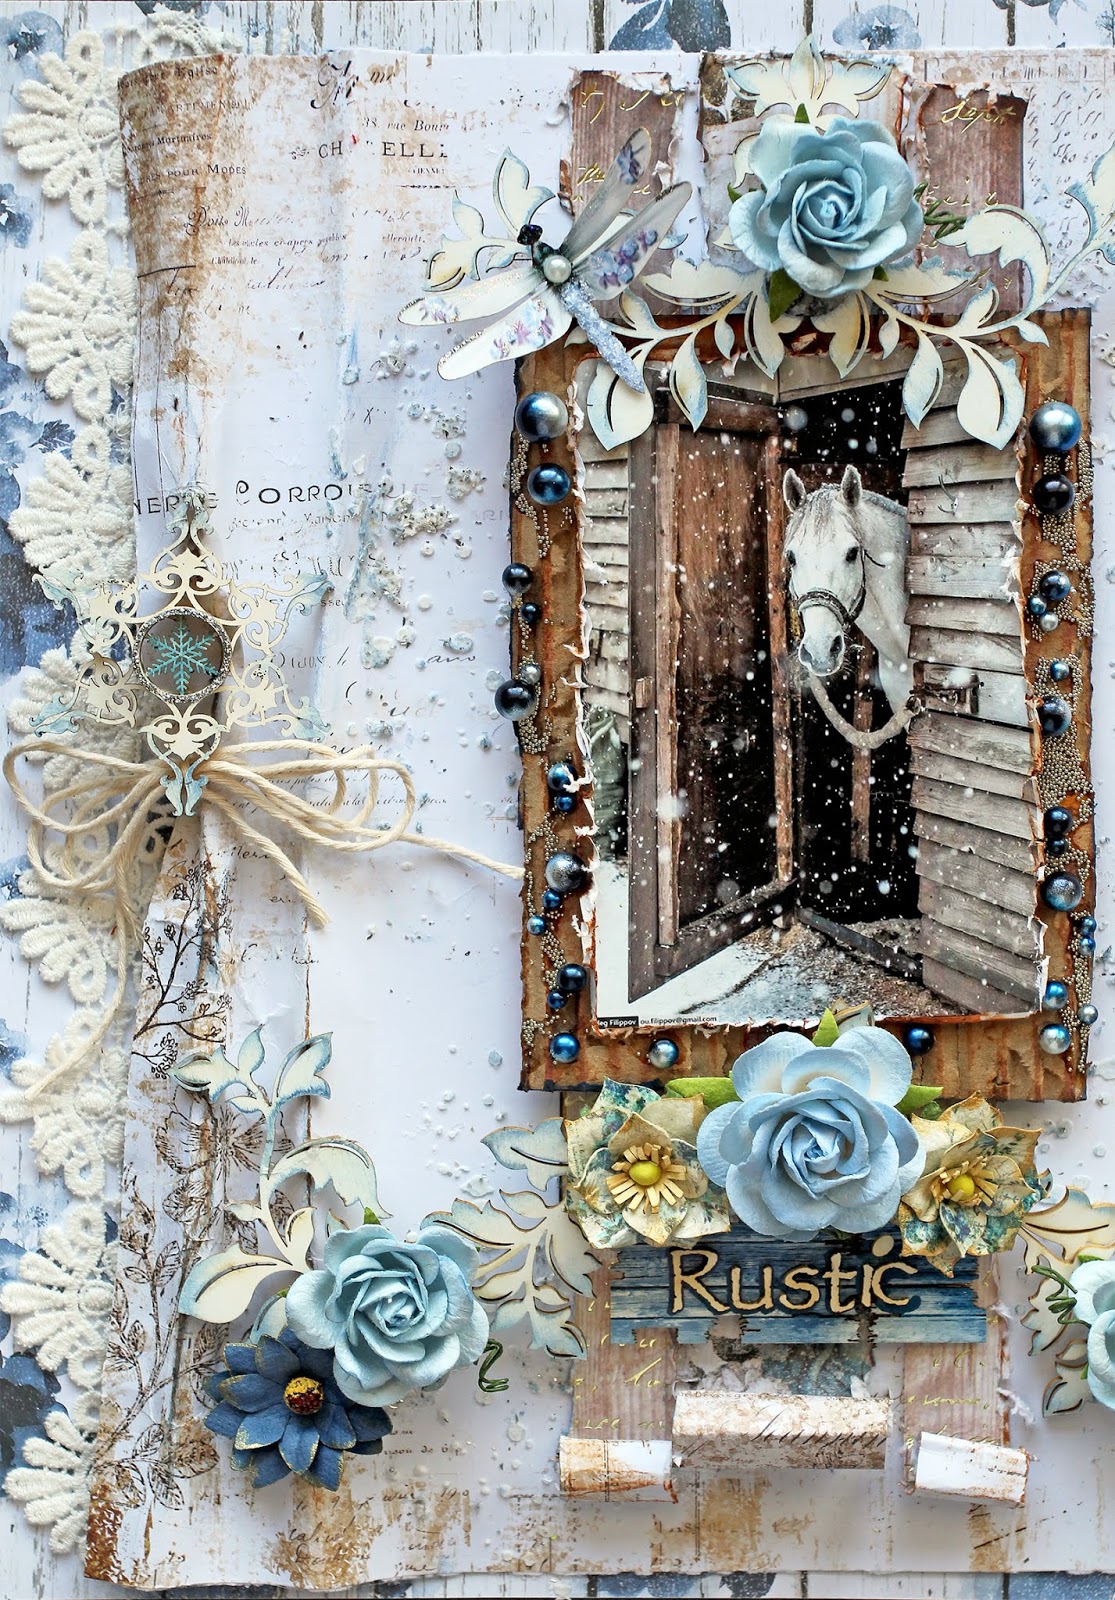
 I started with some layers of Prima Pretty Pale Paper, and then I tore out sections of another sheet of paper to cover up some of the gold foil that I think got a little busy on the papers. The edges were distressed and inked with, 1st a layer of  Tim Holtz Tea Dye Distress Ink, and then I inked on top of that color with some Tim Holtz Tattered Rose Distress Ink just to give me a unique, time worn color and look.


Next, I took a Beautiful Board Laser Cut Chipboard Large Butterfly Flourish Frame, and a paint brush and coated the frame with Ranger Texture Paste. I then heated the texture paste up to make it puff. This gives you the look of resin without all that added weight. I actually took my heat gun, and in places, I got it really close the the paste so that it would slightly burn the edges, because I love the Vintage color this process will give to this look!! I added some tiny little pearls from my stash, and then added some Beautiful Beads Candy Pick Your Color- In Peach Flatback Pearls for an ultra feminine touch.


To add pattern and texture to the layout, I ran some Rose Medallion lace across the bottom section, and then took some more of the same lace, cut it apart, and added it
in random places throughout the layout.


I took a paint brush and painted random puddles of Ranger Opaque Crackle Paste, let that air dry to bring out the crackle, and then took some ultra fine glitter on my fingertip and rubbed it into the cracks which adds a little shine and brings out the deep cracks.


Here you can see all the texture that the Texture Paste and Crackle Paste add to the art piece.


To draw your attention to the photo and frame, I added flowers from the following set:


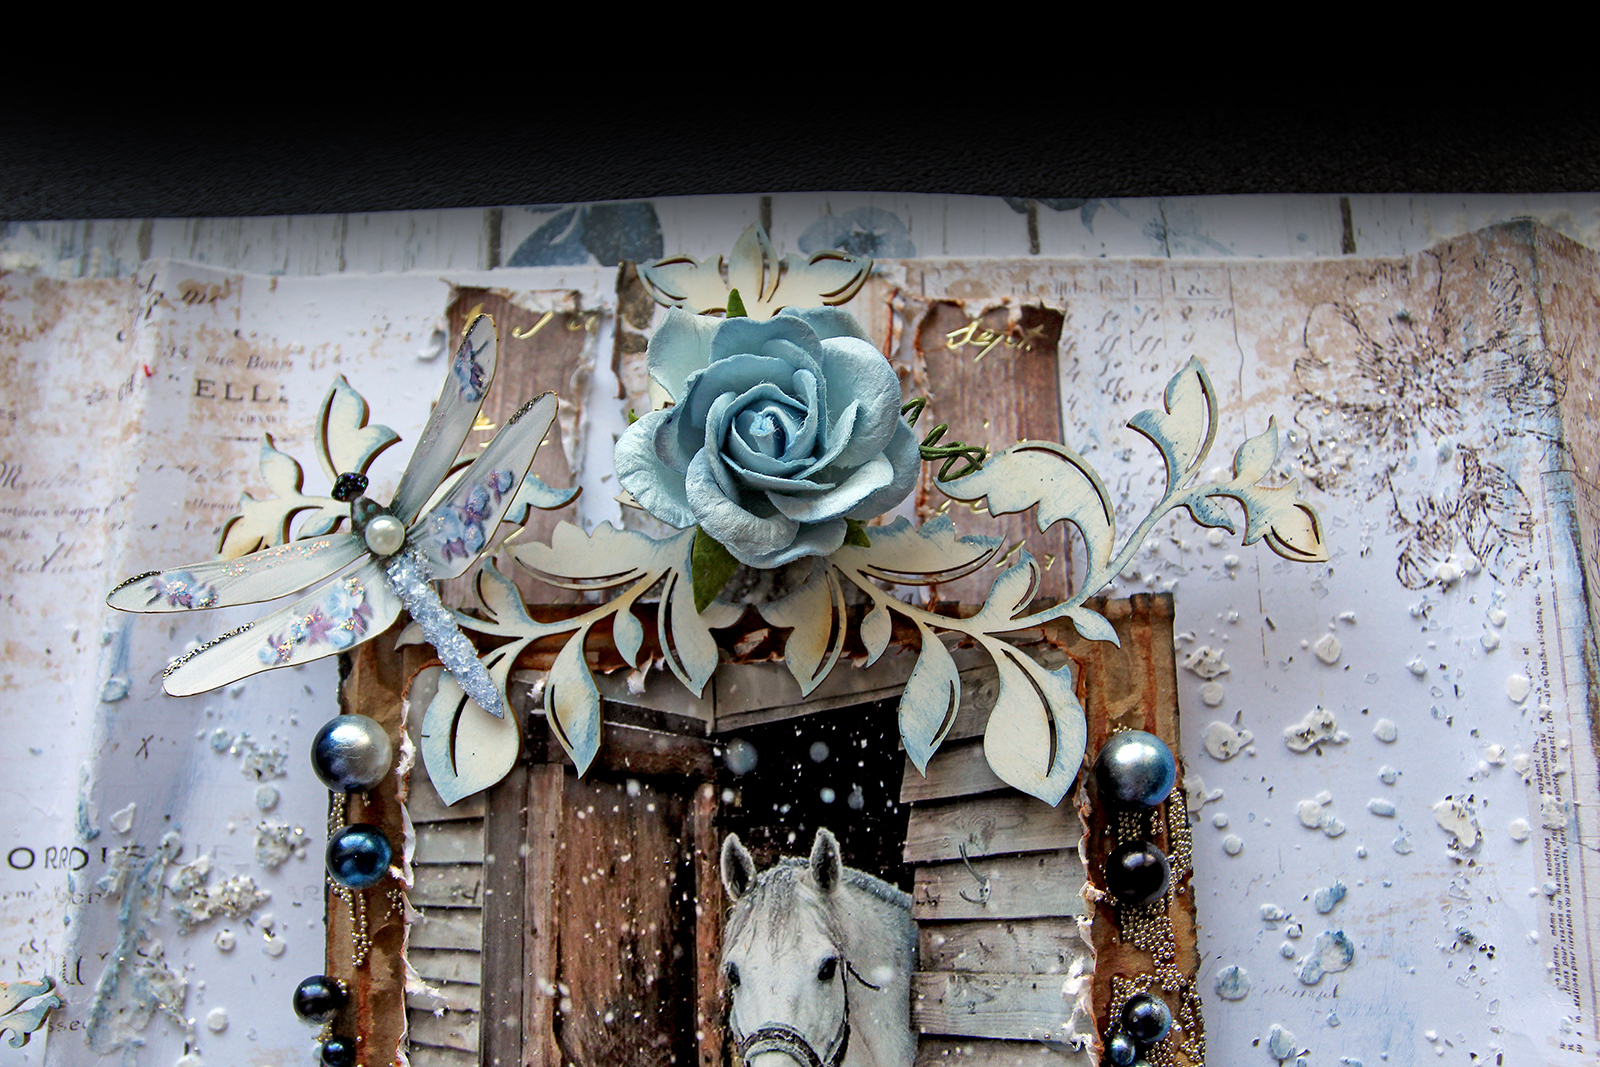
 Using the same technique that I used on the frame I then added in some Beautiful Board Laser Cut Chipboard Medium Butterfly Flourishes topping those with the rose buds from the set and a
Tiny Treasures Sweet Dreams Dusty Peach Butterfly.

Here you can see the Vintage color that slightly burning the Paste gives you that I was talking about earlier 😉

For my "Follow Your Heart" Sentiment, I used the Beautiful Board Laser Cut Chipboard Small Follow Your Heart Beautiful Words, and I multi layer colored the letters with Distress Markers, and then one of my FAV parts, I added Beautiful Beads Iridescent Pearl In Fairy Lights to the bead holes to create a YUMMY unique look!! 


I create a lot of my Laser Cut Chipboard with the bead holes, because I love the color and textures it adds to the designs. My newest AlphBits are actually hand drawn to be a little wonky, so that you don't have to worry about getting them straight or perfect, so that you can "Say It Like You Mean It!!"


   I took the "Heart" Word of this set and did my coloring, then laid it flat on my non-stick craft mat, and poured glue into the little hearts and sprinkled Diamond Chunky Glitter Glass inside of them to give them a glass look.

And here you can see all the dimension and texture that those Reneabouquets Products add to your art!! Thank you for stopping by, and I hope that you "Follow Your Heart" and create something beautiful for yourself or someone you love!! Hugs ~Renea

Friday, April 26, 2019

The Ocean Is Everything I Long To Be~

The Ocean Is Everything I Long To Be, Beautiful, Mysterious, Wild & Free!!
Today, I am sharing a Mermaid themed ATC and Shaker Box Holder that I created for the Reneabouquets April ATC Swap for my partner Tina Goodwin. Tina is an amazing artist herself, and does some of the most gorgeous color work on her art, so I wanted to create something for her that had multiple colors and that just took a lot of time to get really detailed, because I know that she can appreciate the work that goes into that kind of attention to color, texture and dimension.


I grabbed a Beautiful Board Laser Cut Chipboard Small Shaker Box Kit, and put it together, using some Seaside Cottage Papers on the back side instead of the acetate sheet that comes with it.


I filled the Shaker Box with Beautiful Bits Starfish Kisses that I marker colored, Beautiful Beads Iridescent Pearl Mermaid TailsMermaid Shard Glitter Glass, and the little Shell Bits that come with the Beautiful Board Laser Cut Chipboard Small Salty Little Mermaid. Then I painted the entire box with some Gold Metallic Paint.


For the Top Layer, I used the Beautiful Board Laser Cut Chipboard Seashell Scroll Frame that I created to fit the Small Shaker Box,


First, I inked the BBoard in a teal color, and then heat embossed the frame in 4 different color layers of embossing powders for a multi-dimensional color look. The embossing powders also add that really nice rough texture that gives the BBoard such a nice dimensional look.


To decorate the Shaker Box Holder, I added a 
I did multiple layers of coloring with markers, glitter paints and metallic paints to add lots of color and detail to her. I loved creating this piece as a product and as a piece that goes onto my art!!
I surrounded her with some flowers from this set:
Mermaid Tails Mini Mulberry Paper Flower Set and tucked in a shell from this Trinket Set:

Here you can see all the painting on her tail up close.


For the top of the box, I took the
heat embossed it, added on flowers from this set:
and topped the holes with some 


For the ATC part of the set, I started with a
Shell ATC Tag Set that I heat embossed with multiple color layers.


The Frame & Mermaid are from the Teal Mermaid Trinkets  Set, 


I used alcohol inks for multi-layer color the mermaids tail and the frame, and added on some of the Beautiful Beads Iridescent Pearl Mermaid Tails and a purple shell to the frame.

For the waves below the Mermaid I took some Squiggly Beautiful Bits , heat embossed them and layered them on and then accented them with some

I then tied the teal glass orb from the Teal Mermaid Trinkets  with hemp rope to the loop in the mermaid charm.


Here is the back side. The Shards are:


To create the "pocket" I two tone inked a Beautiful Board Bee Hive Elements
and glued it to the back side of the Shaker Box, and popped my ATC inside.


 I really enjoyed creating this fun, colorful piece and I hope you have enjoyed your peek at my project!! Hugs ~Renea

Products Used On This Project That You Can Find At Reneabouquets.com
Mermaid Tails Mini Mulberry Paper Flower Set
Graphic 45 Steampunk Debutante Paper (SOLD OUT)
Blue Fern Studios Seaside Cottage Paper (SOLD OUT)
Aleene's Fast Grab Tacky Glue

Products Used From My Stash:
Embossing Powders
Metallic Paint


Alcohol Inks


Monday, February 25, 2019

Loaded With Goodies!!

I was participating in the Reneabouquets February Loaded Tag Swap, and I wanted to create a special piece for my Swap Partner, Brandy Johnson Metcalf, so I created a very special Beautiful Board Laser Cut Chipboard 5 x 7 Pocket Tag to create this piece with. This piece can be used as a Pocket Card or Tag, or as a stand alone frame. I love being able to design and bring to life pieces that fit the way we as artists create, and to get to use them myself is so fulfilling!


Here is a short video of that project:


Before I glued my piece together, I covered the large panel of the Loaded Tag Kit with some of the paper from the Graphic 45 Botanical Tea Deluxe Collection, and popped on the frame piece.


I then edged it out in Pink Silver Shard Glitter Glass


I heat embossed the Beautiful Board Laser Cut Chipboard Beautiful Words Sweet As Candy pieces and staggered them into my design. Popped some sweet little Butterfly Kisses Delicate Beauty Butterflies, and then added some flowers from the following sets:
Blue & White Roses & Leaves Flower Set (Small Rose)
Pink & Ivory Mini Mulberry Paper Flowers Set
 and tucked in some feathers for softness.

The top part of tag has a top pocket and I tucked 2 Large Journaling tags topped with hand dyed seam binding and bling into it. 


The sides of the Pocket Tag have these sweet little heart cutouts and I just added some pearl strands down the sides to cover the places where the tabs connected the pieces.


I covered the back side with a layer of the Botanical Tea Papers, added a Printed Beautiful Board Laser Cut Chipboard Small Romance & Roses Tuck In to the upper corner. I edged out the pocket in more of the Silver Pink Shard Glitter, added paper to it and then added a Beautiful Board Laser Cut Chipboard Tiny Lacy Heart Frame, and created a multi layer heart topped with organza, cheesecloth and a little pink & ivory rose. I added flowers from the following sets:

I took a set of Printed Beautiful Board Laser Cut Chipboard Sweetheart ATC Tags, Glittered the top part of the tags, added some of the matching papers, and wrapped them with Timeless Ivory Lace.
I added a Pink Rhinestone & Pearl Button so that it can be detached and used to one tag, and 3 little Silver Spoon Trinkets that I added some "sugar" (Diamond Chunky Glitter Glass) to and then added some of the smallest Pink & Ivory Roses and Pink Candy to, attaching them so that they can be removed and used.


I took a little match book, covered it in paper, added lace and a heat embossed Beautiful Word Candy, and some little heart bits that I glittered up. I added Soft Pink Candy to the sides, and on the  inside, it has a 
White Rhinestone & Pearl ButtonSoft Pink Candy, and Baby Blue Candy .


Also, included is a little organza bag of hearts that comes with the Loaded Tag piece topped with another Blue Cherub, a little organza bag with a set of Silver Garden Gate Keys, and a bouquet of Ivory Mini Roses.

I love doing swaps and I hope you have enjoyed taking a peek at my gift, I created for it!
I hope you get a chance to participate in some of the fun events that goes on in the Paper Crafting Community!! If you would like to join us for some of the Reneabouquets hosted events you can find them here:
Reneabouquets Artists With An Edge Facebook Group
Hugs~Renea

Products Used From Reneabouquets.com and the Reneabouquets Etsy:
Graphic 45 Botanical Tea Deluxe Collection
Beautiful Board Laser Cut Chipboard Pocket Tag, Card, Frame

Beautiful Board Laser Cut Chipboard Beautiful Words Sweet As Candy Size Small
Printed Beautiful Board Laser Cut Chipboard Small Romance & Roses Blue Cherub

Printed Beautiful Board Laser Cut Chipboard Small Romance & Roses Heart Frame
Beautiful Board Laser Cut Chipboard Tiny Lacy Heart Frame
Printed Beautiful Board Laser Cut Chipboard Small Romance & Roses Tuck Ins
Printed Beautiful Board Laser Cut Chipboard Sweetheart ATC Tags
Butterfly Kisses Delicate Beauty Butterflies
Blue & White Roses & Leaves Flower Set (Small Rose)
Pink White Roses & Leaves Flower Set (Small Rose)
Pink & Ivory Mini Mulberry Paper Roses Set
Dusty Blue & Ivory Mini Mulberry Paper Roses Set
Pink Silver Shard Glitter Glass
Diamond Chunky Glitter Glass
Flower Crown Lace
Timeless Ivory Lace
Pink Rhinestone & Pearl Button
White Rhinestone & Pearl Button
Soft Pink Candy
Baby Blue Candy
Silver Spoon Trinkets
Silver Garden Gate Key Set
Aleene's Fast Grab Tacky Glue


Wednesday, January 23, 2019

Snowflakes Are Winter's Butterflies~


 Snowflakes are Winter's Butterflies and today they are all a flutter on this Rustic Winter Layout that I created with products from Reneabouquets!

60 Second Video Of Layout:


I started with papers from the Prima Georgia Blues 12 x 12 Paper Pad. Cutting down the 2nd layer, distressing and pleating the edges.


I then added a frosty feeling to the layout by stenciling with a Tim Holtz Speckle Stencil and Ranger Texture Paste. While the paste was still wet I hit it with some Silver Christmas Glitter
Silver Microbeads and then once it was dry did some inking to bring out the design.


I cut out some strips of the Georgia Blues Paper, distressed the edges and inked them with some Tea Dye Distress Ink.
Rolled the bottom ends and layered them onto the center of the layout.


Next, I two tone inked some corrugated board with Denim and Tea Dye Distress Ink and then added some Beautiful Beads Irridescent Pearls in Midnight Magic, and some 
Silver Microbeads to add lots of texture and dimension, and topped it with my photo.


At the bottom of the photo, I added 2-ink edged Beautiful Board Large Elegant Accents Laser Cut Chipboard Pieces, and then added on flowers from the following sets:
I then added a Beautiful Words On Wood Grain (Rustic/Blue Woodgrain) Laser Cut Chipboard piece.


The lace is Sweet Daisy Lace tucked under the paper layers and I added another Shabby Blue Roses Glitter Glass Dragonfly to balance everything out.


Here, I took a Beautiful Board Laser Cut Chipboard Dimensional Snowflakes, inked the edges, colored the center snowflake and added some silver sparkle with some glitter paint, and then created a hemp bow and tucked it underneath.


I love these snowflakes!! I created them so that they come in 4 seperate pieces that you stack together to form dimensional snowflake piece giving you amazing dimension and texture!!


These are perfect for projects like this layout, but they also work beautifully for off the page decorating and decorations because with the white coating they are gorgeous from every angle,~front, back and sideways!!


Here you can see how the products just POP on the page!! Thank you for stopping by!! I hope you are staying warm this Winter and getting to create something beautiful for yourself!! Hugs~Renea

Beautiful Words On Wood Grain (Rustic/Blue Woodgrain) Laser Cut Chipboard
Speckle Stencil