Pages

Wednesday, July 25, 2012

Paris Romance Card

As I begin to write this last blog for my last project as a design team member for The Rubber Cafe, I just wanted to take the time to say thank you to Melissa and Michelle for giving me the wonderful opportunity of working with their amazing stamps and products. I have really enjoyed working for them and have grown so much as an artist while doing so, but need to take a break from being such a high producer for a little while.  So, I bittersweetly offer up the last project of my term.

I created a really red hot, romantic card using my Scraps Of Darkness July Kit-True Romance paired with some of those beautiful Rubber Cafe stamps and products.


I started with some card stock from this month's Scraps Of Darkness Add On, I then layered on a piece of the Webster's Pages Paper that I distressed, from the kit. I then used The Rubber Cafe's Paris Nights Background Stamp and stamped onto another piece of card stock. I then stamped a second tower and embossed it with the Lindy's Embossing Powder from the SOD kit, fussy cut it out, and then using some of The Rubber Cafe's One & Only Tape mounted onto foam, I attached the cut out to the stamped original for dimension. I accented the top of the tower with one of The Rubber Cafe's Crystal Clear Jellie Dots.


I then layered on a piece of the Prima Chipboard from the SOD Romance Add On, took a Vintage Image and distressed the edges, then took a Tim Holtz Acrylic Tile, alcohol inked the edges and placed it over the image for added drama. Next I added a 7 Gypsies "You" banner from the kit, accenting it with some more  of The Rubber Cafe's Crystal Clear Jellie Dots. I popped on a little white mini rose and then added a bead to a pearl tipped stick pin and tucked it and one other pin into the rose.


I added a piece of the Webster's Pages Gems from the Romance Add On to finish out the elegant, romantic look of the card.

It is my hope that you have enjoyed my projects as a Design Team member and that you have learned a few new techniques from me. I know that I have learned a lot from so many of the wonderfully talented women here! It has truly been my pleasure!! ~Renea


The Rubber Cafe Products Used:

Paris Nights Background Stamp
One & Only Tape
Crystal Clear Jellie Dots
Scrap Happy Glue


Thursday, July 19, 2012

Cherished Created With The Scraps Of Darkness July Kit-True Romance

TGIF! Wow, this week has flown by for me! I can't believe my son, Draven, only has about 2 1/2 weeks left before school starts back. Where has the time gone? Today, I would like to share a layout that I created with my beautiful Scraps Of Darkness July Kit-True Romance. It features a photo of my cousin Becky's little girl Emmie playing with her baby chicks. Emmie is a true country girl and I thought some of the kit elements went so well with her sweet photo, and paired with some technique, Dusty Attic Chicken Wire and Bricks from the Scraps of Darkness Store, it turned out perfect for her down home lifestyle!

 I started with layers of the Carta Bella and Prima Almanac papers from both the kit and the Coordinating Paper Add On, doing some distressing, inking, punching and layering.


I used some of the Carta Bella Element Stickers from the Romance Add On, that I Stickled up and applied with foam tape to make the little banner and bird on the paper dimensional.


Here I inked Dusty Attic Chicken Wire with Donna Salazar Pewter Ink and then accented it with Stickles, and added on some flowers from the Flora & Fauna Add On, as well as some foliage.


Here is a close up of some of the Dusty Attic Bricks that I took loose from a panel, inked added Snow Tex to then sprayed with the Pink Ladies Pink Mist from this month's color add on. I then added the little word stickers from the 7 Gypsies Stickers that came with the kit. You can also see all the stamp work I did in the background to add dimension to my layout. Stamping is a great way to add visual texture and dimension to any project!


I took the Carta Bella Ticket Stickers from the Romance Add On, added pieces of burlap, Stickled them up and created the layers underneath the photo.

The flower layer along the side was created using some stash crochet lace,  the Carta Bella stickers from the Romance Add on that I layered and Stickled, lots of flowers from the Flora & Fauna Add On, a cute Prima Rooster chipboard piece from the Romance Add On and some die cut foliage pieces. I then tucked some of the Prima Butterflies from the Flora & Fauna Add On into the flowers, and under the photo corner to add visual interest and texture.

Thanks for the visit and I hope you have a wonderful weekend!!! Hugs, ~Renea

Tuesday, July 17, 2012

Dreams ATCs

Hello everyone, and thanks for stopping by. Today I have 2 ATCs that I would love to share with you. When I first got my Color Add On for my Scraps Of Darkness Kit-True Romance this month, I was so excited to see some Prima Canvas ATCs in it! I had wanted to try my hand at them and this was the perfect opportunity. Also, scrappy time has been limited this summer, so I thought, "Oh I can put together a couple of these, super fast!" Boy, was I wrong!!! With my over embellished, and technique addict style, I did not realize how hard it would be to create on a space that was 2 1/2  x 3 1/2  for me. I don't know what the rules of ATCs are, but I am sure I probably broke all of them-lol! I have stuff spilling over the edges and piled high-oh my!!! I must say, I have nothing but respect for those who make this their trade. I teamed this month's True Romance Kit with some Rubber Cafe stamps and products to create these, and hope you can at least applaud my effort??!


I wanted them to be kind of dreamy and have a multi-media look to them, so I started with the Prima Canvas ATCs from the color add on and got to work.

I misted the 1st canvas with some of the South Shore Sand Lindy's Mist from the Color Add On. Next, I used a stencil and modeling paste to create the stars background, and while the stencil was still in place, I misted it with some of the Pink Ladies Pink Lindy's Mist from the CAO.


I then stamped onto some white card stock using  The Rubber Cafe's Large Moon Stamp, and adhered it to the top left corner.


I then put down a layer of cheesecloth for texture and softness, then fussy cut out a Vintage ballerina photo and added some Rubber Cafe Cotton Candy Jellie Dots to her tutu. I then took some cream card stock and using The Rubber Cafe's Large Left and Right Butterfly Stamps and some Rubber Cafe White Puffies stamped the image, then covered it with The Rubber Cafe's You're So Fine Glitter in Princess Pink, I then heated it up with my heat gun to let it all puff up for some yummy texture. I attached the wings to my image and attached the image to the ATC with some foam tape that I created using craft foam and The Rubber Cafe's One And Only Tape for lots of dimension.


I then added my "keep dreaming sentiment that I made from the Carta Bella Element Stickers from the SOD kit, a inked mini rose, and then took The Rubber Cafe's Scrap Happy Glue, made some puddles, coated them in You're So Fine Glitter in Princess Pink, and added on some Crystal Clear Jellie Dots to finish out my mixed media look.


For the second ATC I misted the Prima Canvas Piece with the Lindy's Pink Ladies Pink Mist, both from the CAO, and then tore out a piece of Prima Almanac paper from the kit, and edged it out in Scrap Happy Glue and then added You're So Fine Glitter in Princess Pink to the edges.

 
I then stamped onto some white card stock using The Rubber Cafe's clock stamp from The Vintage Treasures Set, fussy cut out the clock face and added it to the top right hand corner.


I layered in some cheesecloth for softness and texture, and  then took another Vintage Ballerina Image, and fussy cut it out. I then stamped onto some cream card stock with The Rubber Cafe's Flat Wing Butterfly Stamp and then used some of the Lindy's Embossing Powder from the Scraps Of Darkness Kit to Emboss the wings. I then added on some Rubber Cafe Cotton Candy Jellie Dots to the wings and tutu, adhered the wings to my image and then
attached the image to the ATC with some foam tape that I created using craft foam and The Rubber Cafe's One And Only Tape for lots of dimension


I attached my "Time To Dream" Sentiment tag that I made from the Carta Bella Element Stickers from the SOD kit,  to the bottom corner, popped on an inked mini rose, and then took The Rubber Cafe's Scrap Happy Glue, made a puddle, coated it in You're So Fine Glitter in Princess Pink, and added on some Crystal Clear Jellie Dots to finish out my mixed media look.

Thank you so much for stopping by, and checking out my first attempt at ATCs. I hope you learned something new, I know I did-just how hard this tiny art is!!  Until next time, happy scrapping! ~Renea


The Rubber Cafe Products Used:

Large Moon Stamps
Large Left and Right Butterfly Stamps
The Vintage Treasures Set
Flat Wing Butterfly Stamp
White Puffies
Cotton Candy Jellie Dots
Crystal Clear Jellie Dots
You're So Fine Glitter in Princess Pink
Scrap Happy Glue
One And Only Tape

Saturday, July 14, 2012

Scraps Of Darkness Reveals It's July Kit!!

Get ready to fall in love because, today Scraps Of Darkness reveals it's July Kit-True Romance!! Whether you are a pink sweetheart or a red hot lover, there is something for every romantic in this kit.


With every Scraps Of Darkness Kit you will receive a sketch created just for our kit by the super talented Sue Pup. Here is this month's sketch:


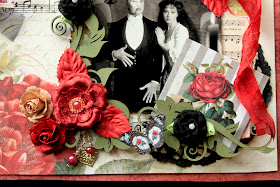
And here is my take on the sketch, featuring one of my all time favorite, oh so romantic, operas, of all time, "The Pahntom Of The Opera." I love music of all kinds and "The Music Of The Night" is one of those heart wrenching ballads that just does something to my soul. I chose a photo of the original cast members, Michael Crawford and Sarah Brightman. If you have never heard either one of them sing, I urge you to, you will not be disappointed. They have voices like angels! I can still remember going into a CD shop with my husband, then boyfriend and strictly rock musician, David and wanting that sound track. He was like, "opera really?" We took it home and I got him to listen to "The Music Of The Night", and he was hooked. Then he listened to "The Phantom Of The Opera" with it's grindy guitars and he never thought about opera the same again.


I started with a front side and a back side of the papers from this month's paper add on.  I cut the top of the top layer at an angle and then burnt the edges to create the look.


I printed out "The Music Of The Night" sheet music onto vellum and using glaze on the back side created a swirl pattern and then layered it behind the burnt edge page. I printed out a small movie poster and tucked it into the layers, along with some tulle as well. I ran the Red Silk Bias Ribbon from the kit along the burnt edge, tucking it into place with some stash Tim Holtz Memo Pins.


Using the Lindy's Embossing Powder from the kit, I stamped and embossed music notes onto the paper, using technique to create lighter and darker notes randomly. I then cut out one of the piano keyboards from a piece of kit paper tore the outer edges, inked them and adhered it to the top left hand corner. I used a stash Dusty Attic ATC from, covering the middle of the frame with black tulle and then added on one of the 7 Gypsies Stickers from the kit, some Prima flowers from the Flora & Fauna Add On, and then hanging the Craftysprinkles hand crafted hat pin included in the Romance Add On, from the bottom to create a beautiful motif piece. 


Here you can see a close up of the ribbon, and embossed stamping.


 I used the Dusty Attic Corner Flourish from the Romance Add on as a base for my flowers, and then added on one of the Prima flowers from the kit and more flowers and leaves from the Flora & Fauna  Add On.


I used another piece of paper from the kit for a photo mat, layered in some sheet music cut from another piece of paper, and one of the 7 Gypsies Envelopes from the kit. I added more flowers and leaves to the upper right hand corner of the photo, trailing the end of the ribbon down the side of the photo, and then finished it all off with a set of Music Of The Night Butterflies from my Etsy Shop.

I love the boldness of the black, white and red, and the slightly edgy effect of the embossing powder, edge burning, and paper tearing. That is one thing that I love about the Scraps Of Darkness Kits, they are technique based and Melinda always includes some of the latest technique items in our Color Add On.  Just by getting the Color Add On Each Month, I have built up quite a stash of wonderful technique items that I find myself reaching for time and time again. Another plus, is that our Design Team is constantly learning, and coming up with new techniques that we love to share with our members through video, photo, and tips and tricks tutorials. Being a part of our club, means easy access to staying on top of all the hottest trends in scrapbooking!!

This next layout features a Vintage image, and includes the following techniques; punching, sewing, masking, misting, stamping on chipboard, and embossing. Techniques can help you to add dimension and visual interest to your projects. With just a few of them, you can take your layouts from the oridinary to the extraordinary.


I started with a layer of kit paper and then took a second layer and punched around the page, I then did some machine sewing in each of the corners to add texture and color contrast.  I then layered on a doilie, made a mat for my photo, sewed around the edges, added one of the Prima Chipboard pieces from the Romance add on and then applied my photo with foam tape for even more dimension.


I then used a Prima stencil and masked my page then misted it using the sand, and ladies pink, Lindy's mist from the color add on, adding instant depth to my page.


 I then layered on a doilie, made a mat for my photo, sewed around the edges, added one of the Prima Chipboard pieces from the Romance add on and then applied my photo with foam tape for even more dimension. I added the white crochet doillie pieces from the Romance add on to the bottom corner of the photo and to the top corner of the layout.


I then took the Dusty Attic Corner Flourish from the Romance Add On, stamped it with a script stamp and clear embossing ink, then embossed it using the Lindy's embossing powder from the kit.


I then took flowers from the Flora and Fauna Add On and leaves from my stash and added them onto the chipboard piece. The sweet little heart crystals were from the kit and I applied them to transparency film then fussy cut around them and added them into my flowers. I added a piece of ZVA bling that I had purchased from the Scraps of Darkness store to the side of the photo.


In the top corner, I  added a piece of the Websters Pages Gems, and a Prima Chipboard Sticker from the Romance Add On, a Prima Flower and Wooden Envelope from the kit, some flowers from the Flora & Fauna and a fussy cut ruler paper piece that was cut and pleated from the kit paper to form the collage layer.


I then added the rest of the ruler paper piece and Websters Gems below the photo, added on some of the Prima Chipboard Pieces, another wooden envelope and some mini roses that I tinted with the mists from the color add on.  To finish my layout out and add more dimension and texture, I added on a set of my Sweet Dreams Butterflies from my Etsy Shop.

I hope you have enjoyed your visit and our reveal over at Scraps Of Darkness. I am so glad you stopped by for a visit!  If you want to take a peek at my Butterlies, Dragonflies and Alphas page, I have added some new clip art on to share with you! Hope you have a good week! Hugs, ~Renea

Tuesday, July 10, 2012

Old Friends Card With Pull Out Tag

Hi everybody, it is officially the middle of the week and I am still no where near getting caught up from my vacation-lol! Oh well, life goes on!! I would love to share a Vintage look card that I created using my Scraps of Elegance July Kit-Isn't She Lovely and some of those wonderful stamps and products from The Rubber Cafe.


I started with a 2 layers of the Graphic 45 papers from the kit, inking and staining the edges of the second layer with some Tim Holtz Vintage Photo Stain from The Rubber Cafe Store. I then added my Vintage photo and staining the edges with the same stain. I added a G45 photo corner Sticker from the SOE kit, and accented it with some Pearl Jellie Dots. I added another G45 Sticker as a header, staining those edges as well.

I then took one of the Melissa Francis Mini Bags & Tags from the Scraps Of Elegance Embellishment Add On, removed the tag and stamped the bag with the epherma stamp from The Rubber Cafe's Vintage Treasures Stamp Set. I then stained some cream cardstock with Tim Holtz Tattered Rose Stain, and then stamped it with clock stamp from The Rubber Cafe's Vintage Treasures Stamp Set and then embossing it with some Tim Holtz Vintage Photo Embossing Powder, adding a Root Bear Jellie Dot to the center for accent.


I then stained the tag with the same Tattered Rose Stain, and then stamped the corners using The Rubber Cafe's Paisley Border Stamp, and then stamped the sentiment using one of the Friends Stamps from the Friends Stamp Set.


I mixed different colors of Tim Holtz Distress Markers to get the rich color variation, and then added a hand dyed ribbon to the top of the tag.


For the bottom of the card, I added some Vintage look lace, a Kaisercraft Honey Flower from the Scraps of Elegance Flower Add On, some hand tinted mini roses and then stamped some leaves using one of the leaf stamps from The Rubber Cafe's Leaf Stamp 1 Set.

I appreciate you stopping by and taking a peek at my card, and hope you have a wonderful ending to the week! ~Renea


The Rubber Cafe Products Used:

Vintage Treasures Stamp Set
Paisley Border Stamp
Friends Stamp Set
Leaf Stamp 1 Set
Tim Holtz Vintage Photo Stain
Tim Holtz Tattered Rose Stain
Root Bear Jellie Dot
Pearl Jellie Dots
Scrap Happy Glue
One and Only Tape

A Portrait Of Sonja

Over at Scraps Of Darkness, Lisa N (Raining) is hosting a really cool challenge called Scrap Each Other. She paired us up with participating members and we then exchange photos and a questionaire that helps us to get to know one another better. I was paired with Sonja (Sonja Goddess), and we are a match made in heaven. We love the same colors, both love the outdoors and both worship the ground our family walks on. We even love the same foods, Mexican, chocolate, icecream and strawberries!! I loved getting to scrap Sonja, because she sent me some of her pregnancy photos, and she totally embraces her pregnancy body and the photos were so natural and beautiful. Her DH captured her wonderfully, and so I left the photos, as is, so she can be seen the way he saw her that day. I scrapped her in my favorite style, girlie grunge, because it so suits her down to earth style. Here is my "Portrait Of Sonja".


 I used the White Rabbit Kit from Scraps of Darkness to create this layout. the earthy warm tones and blues are both Sonja's and my favorite colors and were perfect to capture her natural beauty.


 I chose the bottom photo from the ones that Sonja sent me and loved the filter her DH at used on it. I also cut out one of the other photos that showed off Sonja's Baby Bump Perfectly.


 Here you can see where I cut out some of the file folder pieces from the papers, added some of the ZVA Pearls from the Embellishement add on and then I misted some lace with the Dylusions mists (pure sunshine, london, blue and melted chocolate) from the Color Add On and also spritzed a little Maya Popsicle Blue Mist onto it from a past CAO.


The corrugated board was punched randomly and then I misted it with the same colors as the lace and then took some of the Faber Castell Glaze from the CAO and made puddles, and added hand tinted glitter glass and small beads for lots of texture.


For the title, I attached one of the Bo Bunny Stickers from the kit to the Craftysprinkles Stick Pin from the Embellishment add on and then added some flowers from the Flora & Fauna Add on as well as a rose from a past kit, a beach pebble, and one of the sweet mini bottles from the EAO filled with glitter glass. I then took some wire and hung the lock and key charms from the EAO onto the end of the pin. I created another file folder and lace piece and then used a ZVA bling flourish from a past kit for accent.


I repeated the flowers, flourish and pebble at the top.


I tucked in cheesecloth pieces for natural texture and attached little pieces of trim from the EAO to it. To finish out the layout and add even more dimension I popped on a pair of my Mystical Butterflies from My Etsy Shop.

I just love the colors and delicate meets grunge look of this layout! I hope Sonja loves it as well!
Thanks for the visit! ~Renea

Friday, July 6, 2012

Inspire

Hi everyone! Hope you are getting ready for the weekend and have something fun planned! Before, I slide into the weekend, I would like to share a project that I created using an, oh so gorgeous, Berry71Bleu tag and the Scraps Of Darkness June Kit-White Rabbit. When Marivic created this yummy earthtone tag with it's Vintage Paris look for me, she knew exactly what she was doing. I love earthtones, and they are my fav colors in life and when it comes to scrapping!


I started with one base layer and one punched layer of the Bo Bunny paper from the Scraps of Darkness Kit. I then created a chipboard frame and misted it with layers of the The Dyllusions Mists from the SOD June Color Add On, and then stamped the on top of the color with some of my favorite Color Box Ink that was in a past Color Add On.


I used a felt gate for the mat, then layered on an image of an old Eiffel Tower Post Card I found on Google Images, and then added on my Berry71Bleu Tag for instant glamour.


I used a Prima Mask from a past kit and some of the FaberCastell Gel Medium from this month's SOD Color Add On and created the background, raised lettering, spraying it with some Terra Cotta mist, before removing the stencil.

I created the top floral layer, using some of the Prima Flowers from this month's Flora & Fauna A.O. and a Prima wooden Clock and Bo Bunny Metal Trinket from this month's Romance A.O.


For the bottom corner floral layer, I used a flourish from a past kit, then layered on some more of the flowers, another wooden clock and another metal trinket.


The title was created using some stash Alpha stickers that I colored in with Tim Holtz Markers then coated with the Faber Castell Glaze from the Color Add On and then added some stash Prima bling to for visual interest.


To finish my layout up, I popped on a set of Meet Me In Paris Butterflies from my Etsy Shop.

I love how earthy and Vintage looking this layout turned out! Marivic's beautiful Berry 71Bleu tags, make creating a multi-dimensional layout a breeze!

Thanks for visiting and for letting me share my work with you! Hope you find some creative time this weekend to create something beautiful of your own! Hugs, ~Renea